tion Hike 9 days 8 nights 2017 : Part 1
Day 1: Onion Valley – Camp 1

I arrived quite late at the trailhead because I had a lot of time to talk and prepare before leaving Bishop with Mike, who drove me to Onion Valley, the starting point. Departed from Onion Valley at 4:30 p.m. The trail climbs in elevation on a relatively gentle, well-maintained trail from the Onion Valley Trailhead at about 2,800m to Cairsage Pass at about 3,600m. This trail is approximately 12km = 7.2 miles to the JMT connection point and is called the Caresage Pass Trail. The trail is somewhat dry and dusty, with shrubs such as sagebrush and manzanita scattered here and there, and large rocks are scattered here and there. Along the trail leading up to the pass, despite the dry land, there are ponds, or rather lakes, dotted here and there full of water from melting snow.

Onion Valley Trailhead

Looking up at your destination from the Onion Valley trailhead.

A ridgeline connected to University Peak (4,141 m / 13,589 ft)

Big Pothole Lake
This time too, she chose the familiar Bedrock sandals for her feet. Of course, since I'm expected to wear chain spikes and encounter rocky terrain when traversing snowy valleys, I also have Altra's Lone Peak 3.0 in my backpack. Since my 2014 run up Washington's Olympic Mountain, I personally think that sandals are the best choice for hiking in North America in the summer. The advantage of walking in sandals is that even if you get wet while crossing, they dry faster than any other type of shoes, and best of all, you won't get any blisters or your feet will become soggy and peel. However, if you are not accustomed to hiking in sandals for long periods of time, there is a risk of hurting your feet or injuring yourself from bumps, so you need to be careful. It may not be for everyone. In fact, when you walk on the trail wearing sandals, you'll be more careful with your steps than when you're wearing shoes, and once you get used to it, you'll almost never bump into anything. During this trip, I walked in sandals and shoes about half the time, but when I was wearing the shoes, I got blisters on the soles of my feet even though I was used to the shoes, and I felt discomfort and pain. It is noteworthy that the pain and discomfort disappeared as soon as I changed to sandals.

Bedrock Sandal
If we had left early in the morning, we would have been able to meet up with the JMT before sunset, but since we started at 4:30 p.m., the sun had almost disappeared behind the edge of the mountain by the time we reached Cairsage Pass. was. Also, I wasn't fully acclimatized to the altitude, and I was tired from the journey so far, so my pace was quite slow.
However, thanks to this slow start, we were able to see a breathtaking sunset show at Cairsage Pass. From the pass, you can see a series of 4,000m-class High Sierra mountains stretching far into the distance, and you can enjoy the view for a while as the sunset adds to the divine beauty of this massive and vast range of mountains. I forgot and looked at it.

Sunset view from Caresage Pass

Jason climbing the crags of Caresurge Pass
As the sun went down, I came to my senses and decided to move on. There was enough light to see the trail for a while due to the afterglow, but soon it became impossible to see the trail without a headlamp, so we looked for a suitable campsite near Bullfrog Lake, and by the time we set up Camp 1, it was already 8pm. Time had passed.
I ate Thai curry from Good To-Go , drank some bourbon, and went to bed. Good To-Go's Thai curry that I got from REI in Portland is quite delicious compared to other dry foods I got from America.
Kearsage Pass Sunset Video
Day 2 : Camp 1 – Glenn Pass – Rae Lakes – Camp 2

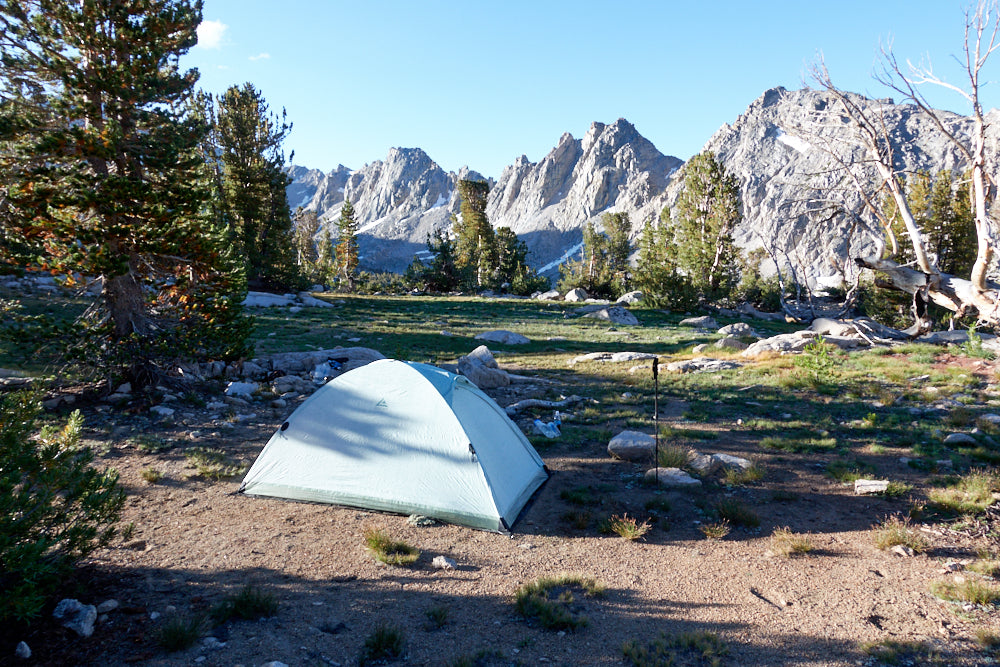
Last night, when we arrived at Camp 1, which was set up in front of Bullfrog Lake, it was dark and I couldn't see much of it, but when I looked around in the morning, I saw the perfect camp with the ridgeline stretching from Kearsage Pinacles to University Peak in front of me. It was the earth. The weather was clear and I felt great from the morning. There are only a few kilometers left until the junction with the JMT, and I think we are already in the middle of Kings Canyon National Park, which includes most of this JMT section hike route, as seen from Cairsage Pass yesterday. The magnificent sunset view and the ridgeline of the Cairsage Pinnacle spreading out in front of me this morning made the experience even more exhilarating. First, I boil water with Jet Boil and drink Starbucks VIA coffee. For breakfast, I eat beef pho from Backpacker's Pantry. After breakfast, we quickly packed up and started walking for the second day.

Caresage Pinnacle and Djedi DCF-eVent

Khufu HB at Camp 1

Jason having breakfast at Camp 1

Caresage Pinnacle and Khufu HB
From Camp 1, I passed Bullfrog Lake and walked a few kilometers to the JMT junction just before Charlotte Lake . This is where the real JMT begins.
This time we had a 10-day schedule. However, on this route, there was no place to replenish supplies along the way, so they had to carry all the food they needed for 10 days. Based on past experience, I made a food plan that was as pared down as possible and eliminated unnecessary items, but even so, I rarely pack enough food for 10 days, so it still feels heavy.
The trails are well maintained and easy to walk, almost like a ``highway''. Beyond Charlotte Lake is today's mountain pass, Glen Pass .

Bullfrog Lake and Mount Brewer (4136 m / 13570 f) distant view

Refill your water supply at the lake just before Glenn Pass. The water is clear and very cold.
Over the past few years, I have taken trips longer than a week, including hiking across Washington's Olympic Mountains in 2014, solo hiking in Colorado's Maroon Bells-Snowmass Wilderness in 2015, and bikepacking in Oregon in 2016. We use the iPhone app GaiaGPS as our navigation system. This is an app that is highly trusted by many people hiking and bikepacking across North America. The trails on the JMT are fairly well-maintained, so you won't get lost like you would on other variation routes, but the offline GPS navigation system is a great addition to any trip. During my Colorado trip, nearly half of the trip was off-trail, and I lost track of the trail many times, but thanks to the pre-loaded routes and offline maps on GaiaGPS, I was able to stay on track. I was saved. Of course, I always carry a compass and a printed paper map as backup. However, in reality, the opportunity to use it is almost zero, and I personally consider this iPhone and Gaia GPS to be the most reliable navigation systems. Since this GPS navigation system was the main focus this time as well, power management of the iPhone was a major issue. Additionally, I decided to use one solar panel and two batteries to power my camera battery, Apple Watch, and AirPods. I've used a number of solar panel chargers over the past few years, but none of them were able to adequately power all the batteries because they broke down or had problems regardless of the sunlight conditions. In this respect, reliability was a major issue. However, with the Anker PowerPort Solar Lite and two Anker PowerCore 10000mAh that I used this time, I was able to fully utilize all of these devices every day. Of course, the weather was generally good throughout the entire trip, which was a major factor in allowing us to fully utilize the performance of the solar panels.

Anker solar charger
As we reached an altitude of about 3,500m, we refilled our water supply at one of the lakes just below Glen Pass. There are still snowflakes floating on the wonderfully clear surface of the lake. To reach Glen Pass, which is 3,635m above sea level, it is a slow climb up the winding trail due to its high altitude. When you reach the pass, a new horizon appears. This moment always excites me. This moment is always the best after a breathless climb up the long, winding tray to the pass. Seeing the path and views of the trail that follows from the pass is the ultimate reward.


Passing Glen Pass, the altitude decreases. The area is dotted with countless ponds and lakes, both large and small. The largest and most famous of these is Rae Lakes.
Rae Lakes consists of three large and small lakes: Upper, Middle, and Lower, and the JMT threads through these Rae Lakes.

Lakes scattered on the north side of Glenn Pass and Rae Lakes

Upper Rae Lake and Black Mountain (4050 m / 13290 ft)
Camp 2 will be set up after passing Lower Rae Lake. Climb up from the trail to a rocky elevation and look for a flat spot suitable for camping. The camping regulations at JMT are very clear and reasonable. There is no rule like in Japan that says you can't camp outside of designated campsites. To camp, "If terrain allows, stay at least 100 feet (30.48 m) from all trails and water sources (such as lakes and rivers); 25 feet (7.62 m) from all trails and from all water sources. Under no circumstances should you camp within 50 feet (15.24 m) of Camp 2 was a campsite with a nice view of Fin Dome. However, the camp in this somewhat humid area with lakes dotted around it was infested with mosquitoes, making it a hassle to eat without wearing a bug net.

Khufu HB and Djedi Dome in Camp 2. There are a lot of mosquitoes, and Jason wears a bug net over his head.

A stag that appeared in Camp 2.
JMT Section Hike 9 days 8 nights 2017 : Continued from Part 2 →